5 Building Construction Types in Architecture

TL; DR


Type I construction is ideal for tall structures as it uses durable materials like concrete and steel. Type II, non-combustible constructions offer a rock-solid defense against fire and are suitable for buildings like schools and offices.


Type III, ordinary constructions, bring charm and looks which is good for mid-sized structures such as commercial buildings and schools. In contrast, Type IV, heavy timber constructions, take us back in time with a touch of tradition.


Explore the budget-friendly Type V wood-framed constructions which are ideal for everyday buildings like homes and small businesses. While each type has its unique applications, considerations, and aesthetic appearance, collectively, they contribute immensely to our built environment.


5 Building Construction Types in Architecture

In architecture, every building tells a story; each characterized by its unique structure. In our everyday lives, construction quietly shapes the world around us. It’s not just about our homes and offices but also about the roads and bridges that link our lives.

Construction is an important aspect of our lives that boosts economic growth, creates jobs, and makes our lives better. Imagine a world without schools, hospitals, or airports – all thanks to construction, we don’t have to.


In this blog journey, we will uncover the diverse varieties of construction. By understanding different construction types, we can appreciate the effort and expertise of architects who bring our built environment to life.

The Five Types of Building Constructions

In the world of construction, we often categorize projects by materials or structure types. But there’s another key aspect to consider, which is the level of fire resistance a building requires.


Let’s take a glance at the five building construction types, through a unique lens. We will explore these types for their design, function, and resilience.

1. Fire-resistive Type I

Type I Fire-Resistive Construction is especially for tall buildings that are over 75 feet. These buildings, like apartments, offices, and hotels, are made to stay strong even if there’s a fire.


Everything inside of these buildings is built using durable materials like concrete and steel which act as shields against fire. These materials work together to ensure that a building does not collapse in a fire.

Applications

It is a go-to choice for tall buildings such as the fancy apartments in tall towers or the big office buildings you see downtown. It’s a special construction type just for them as it keeps everyone safe and offers extra fire protection.


Some common examples include:

  • Corporate buildings
  • Shopping malls
  • Skyscrapers


Considerations

Using strong materials like concrete and steel can cost more money. So, while they’re super safe, it’s also important that you find the right balance between safety and cost.

2.   Non-combustible Type II

Type II Non-Combustible Construction is a rock-solid defender against fire. It’s a perfect option for building structures where it is crucial to keep fire at bay. In these buildings, the important parts such as the walls and floors are made using materials that will not catch fire easily.

Applications

This construction type is versatile and is suitable for different kinds of buildings. It’s not just for tall structures but works well for a range of places like schools, offices, and smaller apartment buildings. If safety from fire is a top priority, Type II is a good choice.

Considerations

The good thing about Type II buildings is that they provide a strong defense against fire. While they might not be as fire-resistant as some other types, they provide a good balance.


However, it is essential to keep in mind that using these strong materials can increase the overall cost of construction.

3.   Ordinary Type III

Type III Ordinary Construction brings a touch of charm to the construction game. It’s about using materials that give a warm, traditional feel to the structure. These materials might not be as tough against fire as some others, but they bring a cozy and classic vibe to the infrastructure.

Applications

This construction type is the go-to for buildings that aren’t too tall but mid-sized. The Type III fits right in and adds a touch of character to the landscape. Some common examples include:


  • Warehouses
  • Commercial buildings
  • Schools


Considerations

The Type III buildings are perfect to add a sense of balance to the building. While they might not be as fireproof as other materials, they certainly know how to add charm to a structure. If you want to go for a building that looks good, this material is a perfect choice for you.

4.   Heavy Timber Type IV

Choosing Type IV Heavy Timber Construction is like taking a step back into a more traditional era. This type of construction relies on large blocks of wood that are connected by metal plates and bolts.

Applications

With this construction type, you can create a building with warm and timeless aesthetics. The heavy timber not only provides strength but also adds character and a touch of tradition to the structure.

Some common examples of Heavy Timber Type IV include:


  • Old churches
  • Factories
  • Barns

Considerations

Now, you might wonder about fire since we’re talking about wood. Here’s the interesting part; these large wooden structures are great at resisting fire. They do well against fire due to their thick structures which means it takes longer to burn.


However, it is important to keep in mind that timber structures are more prone to pest infestations, mold, and fungi attacks. This might increase the overall maintenance cost of the building.

5.   Wood-Framed Type V

Type V Wood-framed construction is perfect for everyday buildings such as homes and small businesses. It’s the go-to choice for those cozy houses and aesthetic shops you see around the neighborhood.

Applications

One of the reasons Type V is so popular is because it’s budget-friendly. This construction type can create cozy and comfortable spaces without breaking the bank. Some common applications include:


  • Restaurants
  • Small hotels
  • Bars
  • Shopping centers

Considerations

Wood might not have the same fire-resistance characteristics as some other materials. This type of construction is the most combustible on the list as exposed wood offers no fire resistance. In case of fire, the building can collapse within a few minutes.


Final Thoughts

In this guide, we explored the different types, from the fire-resistive giants (Type I) to the wood-framed homes (Type V). Each type has its pros and cons, told through materials, heights, and safety measures.

Elevate Your Workspace with Custom Artwork and Formliners

TL: DR: 

Custom artwork and formliners are two remarkable tools for elevating your workspace. The first brings a personal and artistic touch, while the latter enhances the aesthetic appeal of your workspace’s exterior. 

The key is to recognize the potential these creative elements offer and make them work together with your workspace’s identity and purpose.

In the world of aesthetic interior design, the importance of creating an inspiring workspace is immense. A well-designed workspace can have many benefits such as: 

  • Boosted creativity
  • Increased productivity
  • Improved overall atmosphere

While furniture, lighting, and layout play a significant role, custom artwork, and formliners can be game-changers. In this blog, we’ll explore how you can improve your workspace with custom artwork and formliners. 

The Power of Custom Artwork

Custom artwork is a game-changer for interior workspace designs. Here’s how custom artwork can help you out: 

  • Personalized Expression

Custom artwork gives you the opportunity to instill your personality and values into your workspace. It’s a chance to express yourself and tell your story through art. 

Whether you’re an entrepreneur, an employee, or an artist, your workspace should reflect your identity. Choosing custom artwork is a powerful tool to achieve that.

  • Boosting Creativity 

Art has an amazing ability to stimulate creativity in people. When you surround yourself with custom artwork, you get a constant source of inspiration in your workspace. It can be great to help you get more innovative ideas and also help you overcome creative blocks

  • Better Aesthetics 

Going with custom artwork can take the aesthetics of your workspace to the next level. It has the ability to transform ordinary office design into something visually appealing to the eyes.  

You have the option to choose colors, themes, and styles and tailor the workspace according to your personal taste. 

  • Creating a Positive Atmosphere

Art has the ability to evoke emotions. If you choose the right artwork, you can promote a positive atmosphere in your workspace. 

Incorporating uplifting and inspiring pieces of artwork can also improve your mood and reduce stress. Especially, in a corporate setting, this aspect can lead to happier and more engaged employees.

  • Building a Unique Identity

In today’s competitive world, businesses aim to stand out from their competition. Custom artwork can be a unique selling point for your workspace. 

It not only sets you apart but also leaves a lasting impression on clients, customers, and employees. This also sends a message that you care about your workspace and the people who work there.

How to Choose Custom Artwork for Your Workspace?

There are plenty of aspects involved when it comes to choosing artwork for your workspace. In this section, we will help you in choosing the right custom artwork. 

  • Understand Your Space

The first thing you need to do is assess your workspace. Make sure to consider the size of the walls, the lighting, and the overall ambiance. The artwork that you choose should be in harmony with these elements. 

For example, a large, brightly lit space may benefit from large, vibrant paintings. On the other hand, a smaller workplace may require smaller and subdued art pieces.

  • Consider Your Brand and Values

If you’re decorating a workspace for your business, it’s essential to align your office artwork with your brand’s identity and values. 

Your artwork should convey a message that resonates with your mission and vision. This can be achieved through the choice of colors, subject matter, and style.

  • Work with Artists and Designers

Collaborating with professional artists or designers is a wise choice when selecting custom artwork for your workspace. They can guide you through the process and help you choose and create pieces that best suit your workspace. 

They will also ensure that the artwork is of the highest quality and complements your vision.

  • Mix and Match Artwork

Don’t be afraid to mix different types of artwork. You can combine paintings, sculptures, and photographs to create a dynamic and visually appealing workspace. 

The key is to ensure that the pieces harmonize with each other and the overall theme of the workspace.

  • Be Open to Change

The beauty of custom artwork is that it’s adaptable. If you feel that a particular piece no longer suits your workspace or that it’s time for a change, don’t hesitate to switch things up. Art can evolve with your workspace’s needs and your personal growth.

Understanding Formliners

Now that we have explored the transformative potential of custom artwork, let’s introduce another concept: formliners. 

Formliners are versatile construction materials primarily used in the architectural and design industries. They can provide numerous advantages such as: 

  • Texture and Design

Formliners are used to create unique textures and patterns on concrete surfaces, such as walls, facades, and pavement. 

These textures and patterns can be customized to match the aesthetics of a building or outdoor space. In this way, formliners add an artistic and architectural touch to your workspace’s exterior.

  • Versatility

Formliners are not limited to just one style. They come in various patterns, from natural textures like stone and wood to more abstract, artistic designs. You can choose the texture that best complements your workspace. 

  • Aesthetic Appeal

They can also add an element of aesthetics to architectural structures. With their help, you can transform a plain concrete wall into a visually interesting and engaging part of your workspace’s exterior. This can create a more appealing first impression for visitors and clients.

Elevating Your Workspace with Formliners

Here’s how you can use formliners to improve your workspace: 

  • Facade Enhancement

Formliners are commonly used to enhance building facades. The choice of texture and design can reflect the identity of your business or the aesthetics of your workspace. 

For instance, a creative agency might go for a formliner that showcases a dynamic, modern pattern, while a nature-inspired design could be given a go for an eco-conscious organization.

  • Outdoor Spaces

Formliners are not limited to indoor use. They can also be used to revamp outdoor spaces within your workspace. Whether it’s a courtyard, pathway, or seating area, formliners can add a touch of artistry to your surroundings.

  • Branding

Just as custom artwork reflects your brand indoors, formliners can extend your branding efforts to the exterior of your workspace. By integrating your logo or brand elements into the formliner design, you can create a cohesive and memorable look for your workspace.

  • Sustainability

Many formliners are made from durable and environmentally friendly materials. By incorporating sustainable design elements into your workspace, you not only reduce your environmental footprint but also align your brand with eco-friendly values.

Introduction to Formliners: Easy Ways to Customize Concrete in Architecture

TL; DR

Formliners are a versatile and transformative tool in the world of concrete design. They offer opportunities to enhance the visual appeal, texture, and customization of concrete surfaces. 

Whether you’re aiming for a classic or modern look, formliners can bring architecture’s unique vision to life. Moreover, they align with sustainable construction practices by reducing resource consumption.

To make the most of formliners, select the right type based on your project’s needs and follow the essential steps such as: 

  • Preparation
  • Installation
  • Pouring
  • Curing
  • Removal

With proper execution, formliners can turn ordinary concrete into works of art, elevating the aesthetics and functionality of architecture. 

Do you dream of adding a touch of personality and creativity to your concrete projects? Formliners are here to help. In the world of concrete design, formliners are considered secret weapons that can transform plain concrete surfaces into aesthetic works of art. 

Formliners offer easy and versatile ways to customize concrete like never before. In this blog, you’ll explore using formliners to customize concrete surfaces. 

Transforming Concrete with Formliners

Concrete is a main tool in construction and architecture due to its reputation for sturdiness and reliability. However, we often see concrete finishes as bland and uninspiring. 

If you’re looking to add personality and artistic flair to your concrete projects, there’s an underutilized secret waiting for you: formliners. These materials can take your concrete surfaces from ordinary to extraordinary. 

What Are Formliners?

Before we dive into how formliners can transform concrete, let’s understand what they are. Formliners are molds or templates made from various materials, such as rubber, plastic, or foam. 

They are designed to be placed within the formwork before pouring concrete. When the concrete sets and the forms are removed, the surface shows the intricate design or texture of the formliner.

Elevating Aesthetics

One of the main advantages of formliners is their ability to enhance the visual appeal of concrete surfaces. Whether you’re working on a residential project like a driveway or working on larger commercial ventures, formliners offer an extensive range of patterns and textures for every project. 

From classic brick and stone patterns to more avant-garde designs, formliners allow you to mimic the aesthetic appearance without a hefty price tag.

Texture and Depth

Formliners aren’t limited to aesthetics alone; they can also introduce texture and depth to your concrete structures. Formliners also have the ability to add tactics dimension to concrete structures. 

This tactile dimension can significantly enhance the sensory experience of your space which makes it more engaging.

Customization Without Constraints

Creativity knows no bounds, and with formliners, your design possibilities are limitless. You can craft customized designs to meet your project’s unique requirements. 

Whether you’re aiming for a weathered appearance or a sleek, modern finish, formliners can help you achieve your vision with precision.

Sustainability Matters

In today’s world, sustainability is a top priority for many businesses. Fortunately, formliners align with eco-friendly construction practices. 

By enabling you to replicate the appearance of scarce resources, you can save natural habitats and reduce waste; while also achieving your desired construction goals.

Factors to Consider Before Choosing a Formliner?

Selecting the perfect formliner is the first and crucial step in your concrete design journey. Here are some factors to consider before choosing a formliner: 

1. Design Vision

Begin by visualizing the final look of your concrete project. Are you aiming for a classic, timeless appearance, or do you have a more contemporary vision? The design style you desire will influence the type of formliner you choose.

2. Material and Texture

Formliners are available in various materials, including rubber, plastic, and foam. Each material has its unique qualities, affecting the final texture and appearance of the concrete surface. Consider the tactile and visual effects you want to achieve when selecting the material.

3. Reusability

If you have multiple projects in mind, you might want to invest in reusable formliners. These can be a cost-effective choice, especially for contractors or builders who often anticipate using them.

4. Project Size

The scale of your project matters as well. Some formliners are better suited for smaller residential applications, while others are designed for more extensive commercial or industrial projects. Make sure the formliner you select aligns with the scope of your work.

5. Environmental Impact

In today’s eco-conscious world, sustainability is a consideration for many builders. Look for formliners manufactured with environmentally friendly practices and materials which help you reduce your project’s carbon footprint.

Preparing Concrete Canvas

Once you’ve chosen the right formliner, it’s time to prepare your concrete canvas. Here’s what you need to do:

1. Clean and Smooth Forms

Ensure that the forms or molds into which you’ll pour the concrete are clean, debris-free, and smooth. Any imperfections in the form can transfer to the concrete’s surface which can affect the final result.

2. Proper Form Release

Apply a suitable form release agent to prevent the concrete from adhering to the forms. This will make removing the forms easier and reveal the textured surface created by the formliner.

3. Concrete Mix

Select a high-quality concrete mix that’s suitable for your project. Follow the manufacturer’s recommendations for water-to-cement ratio and mix consistency. The right mix ensures the concrete adheres well to the formliner.

Formliner Installation

Installing the formliner correctly is crucial to achieving the desired outcome. Here are the steps involved:

1. Secure the Formliner

Securing the formliner is the first crucial step in ensuring the success of your concrete design. Here’s how to do it:

  • Cleaning and Preparation: 

Before attaching the formliner, make sure the interior of the formwork is clean and free from any debris or dirt. Any imperfections or foreign materials can negatively affect the texture and appearance of the final concrete surface.

  • Alignment: 

Position the formliner evenly within the formwork. Ensure that it aligns precisely with your design intentions. Take your time to double-check the alignment to avoid any discrepancies in the outcome.

  • Fastening: 

Use appropriate fasteners or adhesives to securely attach the formliner to the formwork. Ensure it is firmly in place and won’t shift during concrete pouring.

2. Pour the Concrete

The second step is where you pour the concrete into the prepared forms. This phase requires careful attention to detail to achieve an even and textured surface:

  • Concrete Mix: 

Choose a high-quality concrete mix that suits your project’s requirements. Follow the manufacturer’s recommendations regarding the water-to-cement ratio and mix consistency. This ensures the concrete adheres well to the formliner and captures all the details.

  • Minimizing Air Bubbles and Voids: 

As you pour the concrete, use appropriate techniques to minimize the formation of air bubbles and voids. These imperfections can disrupt the texture created by the formliner. Techniques such as vibrating the concrete or using a concrete screed can help ensure a smooth and even surface.

  • Even Distribution: 

Pour the concrete evenly across the form, ensuring it covers the formliner uniformly. Avoid creating excess pressure on the formliner, which could cause it to shift or deform.

3. Cure and Remove

Once the concrete is poured, it’s time to let it cure and properly reveal the textured surface created by the formliner:

  • Curing: 

Follow the manufacturer’s instructions for curing the concrete. This typically involves keeping the concrete moist and at the right temperature for a specified period. Proper curing is essential to achieve the desired strength and durability of the concrete.

  • Patience: 

Curing can take several days, depending on the concrete mix and environmental conditions. Be patient and resist the temptation to remove the forms prematurely.

  • Form Removal: 

After the concrete has cured according to the manufacturer’s guidelines, carefully remove the forms. Take your time during this step to ensure that the formliner is not damaged or displaced in the process.

By following these steps for securing, pouring, curing, and removing the formliner, you’ll be well on your way to achieving the desired outcome for your concrete project. The careful execution of these steps is the key to creating concrete surfaces that are structurally sound and visually stunning.

Understanding Thin Brick: An In-depth Guide to Features, Applications, and Installation

Thin brick is revolutionizing modern construction. This versatile material mimics the appearance of traditional bricks while offering several advantages. Its lightweight nature and ease of installation make it a popular choice in contemporary architecture.

Key takeaway: Thin brick offers a perfect blend of aesthetic appeal and practical benefits, making it ideal for various architectural applications.

In this article, you’ll learn:

  • What thin brick is and its unique characteristics
  • Why thin brick is an excellent choice for construction projects
  • Various applications of thin brick in residential and commercial settings
  • A detailed guide on how to install thin brick efficiently and effectively

What is Thin Brick?

Thin brick is a lightweight construction material designed to mimic the appearance of traditional bricks. Unlike conventional bricks, which are several inches thick, thin bricks typically measure around 0.5 inches in thickness. This significant reduction in size provides several advantages, including ease of handling and installation.

Unique Characteristics of Thin Brick

  • Lightweight: The reduced thickness makes thin bricks much lighter than traditional bricks, easing the transportation and installation process.
  • Versatility: Available in a variety of colors, textures, and finishes, thin brick can replicate the look of materials such as stone or wood.
  • Cost-Effective: Less raw material is used in manufacturing thin brick, making it a more economical option without sacrificing aesthetic appeal or durability.

Types of Thin Brick

Several types of thin brick are available to suit different applications:

  • Thin Brick Veneer Commonly used for both interior and exterior walls.
  • Offers the classic look of full-sized brick at a fraction of the weight.
  • Thin Brick Tile Ideal for flooring and smaller surfaces like backsplashes.
  • Provides a durable and visually appealing finish.
  • Thin Brick Wall Panels Prefabricated panels that incorporate multiple thin bricks.
  • Simplifies installation by reducing the need for individual brick placement.
  • White Thin Brick Features a clean, modern aesthetic perfect for contemporary designs.
  • Available in various shades of white to fit different design schemes.

Standard Dimensions and Variations

The standard dimensions for thin bricks are approximately:

  • Length: 7.5 inches
  • Width: 2.25 inches
  • Thickness: 0.5 inches

However, these sizes may vary depending on the manufacturer. Some manufacturers offer custom sizes to meet specific project requirements.

Understanding these basic elements helps you make informed decisions when choosing thin brick for your construction projects.

Why Choose Thin Brick for Your Construction Projects?

Lightweight Construction

One of the main advantages of thin brick is its lightweight nature. Traditional bricks are bulky and heavy, making them more challenging to handle and install. In contrast, thin bricks are much lighter, which allows for easier handling during installation. This lightweight characteristic means that thin brick can be used in places where traditional bricks might not be feasible due to weight constraints.

Diverse Aesthetic Options

Thin brick offers a wide range of aesthetic options. Whether you’re aiming for a rustic look or a sleek, modern facade, thin brick provides designers with the versatility to achieve these desired appearances without compromising on quality. Available in various colors, textures, and finishes, you can find thin brick that mimics other materials like stone or even wood. This diversity enables you to customize spaces to fit specific design themes seamlessly.

Cost-Effective Solution

Thin brick is also a cost-effective construction material. Its smaller size and reduced weight mean less raw material usage compared to traditional bricks. Additionally, the ease of handling and installation can significantly cut down labor costs. The use of specific mortar for thin brick allows it to adhere well to various surfaces like drywall and plywood, reducing the need for extensive preparation work.

  • Less Raw Material: The production of thin brick requires fewer resources.
  • Reduced Labor Costs: Easier handling translates into less time and effort during installation.
  • Minimal Waste: Precise manufacturing processes result in less material waste.

Choosing thin brick for your construction projects combines aesthetic flexibility with practical benefits such as ease of installation and cost savings, making it an ideal choice for both residential and commercial applications.

Exploring the Versatile Applications of Thin Brick

Thin brick is a highly adaptable material that can be used in both residential and commercial settings. Its ability to enhance interior design and exterior facades makes it a favorite among architects and designers.

Interior Design

Accent Walls

  • Thin brick accent walls add texture and visual interest to living rooms, bedrooms, or kitchens.
  • Available in various colors and finishes, they can match any design theme from rustic to modern.

Fireplaces and Backsplashes

  • Transform your fireplace into a focal point with thin brick cladding.
  • Kitchen backsplashes made from thin brick offer an easy-to-clean surface that also provides a stylish backdrop.

Exterior Facade

Building Exteriors

  • Ideal for upgrading the facade of homes or commercial buildings.
  • Durable and weather-resistant, making it a practical choice for long-term use.

Entryways

  • Enhance curb appeal with a welcoming thin brick entryway.
  • Customizable to fit any architectural style.

Flooring Options

Indoor Flooring

  • Thin brick can be used for indoor flooring, providing a unique aesthetic that mimics traditional brick floors.
  • Suitable for high-traffic areas due to its durability.

Outdoor Patios

  • Create charming outdoor spaces like patios or walkways.
  • Offers slip-resistance, making it safe for outdoor usage.

Landscaping Features

Garden Paths

  • Thin brick paths can guide visitors through gardens while adding an element of classic beauty.
  • Easy to install and maintain, making them an excellent DIY project.

Retaining Walls

  • Construct retaining walls that blend naturally with the landscape.
  • Provides both functional support and aesthetic enhancement.

Thin brick’s versatility allows it to be used in many applications, each bringing its timeless charm into different environments. This adaptability ensures that whether you’re working on an interior design project or enhancing an exterior facade, thin brick will meet your needs.

A Step-by-Step Guide to Installing Thin Brick Like a Pro!

1. Preparing Your Wall Surface for a Flawless Finish

Proper wall surface preparation is essential to ensure the successful installation and longevity of your thin brick project. Skipping this step can lead to adhesion problems and an uneven finish.

Key steps in wall surface preparation:

  • Clean the Surface: Remove any dirt, dust, or grease from the wall. Use a mild detergent and water solution, then allow the wall to dry completely.
  • Repair Any Damages: Fill holes, cracks, or uneven sections with appropriate filler material. Sand down any rough patches to achieve a smooth surface.
  • Check for Moisture: Ensure the wall is dry. Moisture can weaken the adhesive bond and cause long-term damage.
  • Prime or Seal the Surface: Depending on the substrate, apply a primer or sealant to create an ideal bonding surface. For example, use a masonry primer on concrete walls and a wood sealer on plywood surfaces.

Example: For drywall surfaces, you might use a high-quality latex-based primer to ensure proper adhesion of the thin brick mortar.

By meticulously preparing your wall surface, you set the stage for a durable and visually appealing thin brick installation. This groundwork ensures that your project remains robust and attractive for years to come.

2. The Ultimate Step-by-Step Installation Process You Need to Follow!

Installation Guide for Thin Brick

Installing thin brick can be a rewarding project when done correctly. Here’s a detailed step-by-step installation process to ensure your thin brick application looks professional and lasts for years.

Step 1: Gather Your Materials and Tools

To start, you’ll need:

  • Thin bricks
  • Thinset mortar
  • Notched trowel
  • Level
  • Spacer clips
  • Grout
  • Grout float
  • Metal lath (for plywood substrates)
  • Backer board or drywall (for wall surfaces)
  • Measuring tape
  • Chalk line
Step 2: Preparing the Substrate

For Plywood Surfaces:

  • Attach metal lath securely to the plywood.
  • Apply a scratch coat of mortar over the lath, ensuring it is evenly spread.
  • Let the scratch coat cure for at least 24 hours.

For Drywall Surfaces:

  • Ensure the drywall is clean and free of dust.
  • Use a notched trowel to apply a layer of thinset mortar directly onto the surface.
Step 3: Layout Planning
  • Measure and mark guidelines on your wall using a chalk line.
  • Plan your layout by dry-fitting the thin bricks, starting from the bottom center and working outward.
Step 4: Applying Thinset Mortar
  • Using a notched trowel, spread the thinset mortar over a small section of your substrate.
  • Hold the trowel at a 45-degree angle to create grooves in the mortar for better adhesion.
Step 5: Placing Thin Bricks
  • Press each brick firmly into the mortar, aligning with your chalk lines.
  • Use spacer clips between bricks to maintain even gaps.
  • Continue placing bricks row by row, checking regularly with a level.
Step 6: Cutting Bricks for Edges and Corners
  • Measure and mark bricks that need cutting for edges or corners.
  • Use a wet saw or tile cutter for precise cuts.
Step 7: Filling Joints with Grout
  • After all bricks are in place, allow them to set for at least 24 hours.
  • Mix grout according to package instructions.
  • Use a grout float to fill joints, pressing grout into spaces between bricks.
Step 8: Cleaning Excess Grout
  • Wipe away excess grout from brick surfaces using a damp sponge.
  • Allow grout to cure per manufacturer’s recommendations before touching up any areas if needed.

This method ensures you achieve a flawless finish while working with various substrates like plywood or drywall effectively.

3. Post-Installation Care: Keeping Your Thin Brick Beautiful Over Time!

Maintaining the beauty of your thin brick installation requires attention to detail during the post-installation phase. Proper care will ensure durability and aesthetic appeal.

Filling Joints with Grout

  • Vacuum Dust: Before applying grout, vacuum the wall surface thoroughly to remove any dust and debris. This step is crucial for ensuring a clean and secure bond.
  • Choose the Right Grout: Select a grout that complements your thin brick’s color and texture. The right grout enhances the overall look of your installation.
  • Applying Grout: Use a grout bag or a trowel to fill the joints between the bricks evenly. Make sure to press the grout firmly into the joints to avoid gaps.
  • Smooth and Clean: After filling, smooth out the joints with a pointing tool or your finger for a uniform finish. Wipe away excess grout from the brick surfaces using a damp sponge before it dries.

Sealing for Longevity

  • Sealant Application: Applying a high-quality sealant can protect your thin bricks from moisture, stains, and wear. Follow the manufacturer’s instructions for best results.
  • Regular Cleaning: Maintain your thin brick surfaces by cleaning them regularly with mild soap and water. Avoid harsh chemicals that may damage the finish.

Proper post-installation care not only preserves the appearance but also extends the life of your thin brick installation.

Conclusion: Embracing the Timeless Beauty of Thin Brick in Modern Construction Projects

Incorporating thin brick into your construction projects offers a myriad of benefits. Architects and builders can achieve the classic look of traditional bricks without the associated weight and labor costs. The versatility and cost-effectiveness of thin brick make it an ideal choice for both residential and commercial applications.

Key Benefits:

  • Aesthetic Appeal: Mimics traditional bricks, offering diverse colors and textures.
  • Ease of Installation: Lightweight nature simplifies handling and installation.
  • Cost-Efficiency: Reduced raw material usage and labor requirements.

Thin brick provides a durable, attractive, and practical solution for modern construction needs. Its ability to enhance various settings ensures that it remains a valuable component in contemporary architecture. Embrace thin brick to elevate your next project with timeless beauty and efficiency.

FAQs (Frequently Asked Questions)

What is thin brick and how does it differ from traditional bricks?

Thin brick is a modern construction material that offers a unique blend of aesthetic appeal and practical benefits. Unlike traditional bricks, thin bricks are lighter and can be used in various applications without the bulkiness associated with standard bricks.

What types of thin brick are available in the market?

There are several types of thin brick available, including veneer, tile, wall panels, and white thin brick. Each type comes with standard dimensions and variations depending on the manufacturer, allowing for diverse design options.

Why should I choose thin brick for my construction projects?

Thin brick is advantageous due to its lightweight nature, which simplifies handling and installation. It also offers a wide range of aesthetic options while being cost-effective due to reduced raw material usage and lower labor requirements during installation.

In what applications can thin brick be used?

Thin brick can enhance both interior and exterior spaces in various settings, such as residential homes and commercial buildings. Specific applications include accent walls, exterior facades, fireplaces, backsplashes, flooring options, and landscaping features like garden paths or retaining walls.

What steps should I follow to install thin brick properly?

To install thin brick effectively, start by preparing the wall surface to ensure proper adhesion. Follow a detailed step-by-step installation process based on your chosen substrate (e.g., plywood or drywall). After installation, maintain your thin bricks by filling joints with grout after vacuuming dust from the wall surface.

What are the post-installation care tips for maintaining thin bricks?

Post-installation care involves ensuring that joints are filled with grout after cleaning the wall surface. Regular maintenance will help keep your thin brick looking beautiful over time and preserve its timeless charm in your construction projects.

The basics of Tilt-Up construction

Introduction

Tilt-Up construction is a building method that involves casting concrete wall panels on-site and then tilting them into position using cranes. This approach is recognized for its cost-effectiveness and efficiency.

Key Benefits of Tilt-Up Construction:

  • Cost-Effective: Reduces labor costs and accelerates the construction timeline.
  • Design Flexibility: Allows for various architectural designs, accommodating creative and functional requirements.
  • Energy Efficiency: Concrete walls offer superior thermal mass, contributing to better energy management.
  • Fire Resistance: Concrete’s inherent properties enhance the safety of the structure.

Its popularity in the construction industry is growing due to these advantages. Whether for commercial, industrial, or institutional buildings, Tilt-Up construction proves to be a reliable and efficient choice. For more information on specific patterns and types of plastic formliners used in construction, you can explore Custom Rock’s collection of Plastic Formliners. Architects can also benefit from Custom Rock’s comprehensive resources, which include application guides, specifications, and brochures to assist in effectively using formliners and creating visually stunning concrete finishes.

A Closer Look at the Tilt-Up Construction Process

Tilt-Up construction is a meticulous process that requires careful planning and execution. Here are the primary steps involved:

1. Preliminary Project Planning

  • Initial design and engineering considerations
  • Budgeting and scheduling
  • Obtaining necessary permits and approvals

2. Site Preparation and Foundation Slab Pouring

  • Clearing and grading the site
  • Installing underground utilities
  • Pouring the foundation slab, which serves as the casting bed for wall panels

3. Assembly of Forms for the Wall Panels

  • Constructing forms that outline each panel’s shape, which can be enhanced using formliners for architects to elevate the aesthetics of the construction project
  • Ensuring forms are built to precise dimensions for accuracy, with a wide range of high-quality urethane and plastic formliner patterns available to choose from

4. Installation of Reinforcing Bars Within the Panels

  • Placing steel rebar within each form to enhance structural integrity
  • Detailing rebar placement according to engineering specifications

5. Pouring Concrete with Insulation in Place

  • Pouring concrete into forms, often including insulation layers for better thermal performance
  • Using vibration techniques to ensure proper compaction and eliminate air pockets

6. Lifting and Placement of Panels Using Cranes

  • Utilizing cranes to tilt-up and position the cured panels into their vertical orientation, which require robust equipment capable of handling heavy loads while maintaining precision during placement
  • Ensuring alignment with foundation anchors

7. Removal of Forms After the Panels Have Cured

  • Dismantling forms once panels have achieved sufficient strength
  • Cleaning and preparing forms for potential reuse

8. Finishing Touches on the Exterior Walls and Joints

  • Sealing joints between panels with caulking to prevent moisture ingress
  • Applying exterior finishes such as paint or textured coatings

By following these steps meticulously, construction teams can ensure the successful completion of Tilt-Up projects, delivering durable and aesthetically pleasing structures.

Advantages of Choosing Tilt-Up Construction for Your Next Project

Design Versatility and Architectural Creativity

Tilt-Up construction offers significant design flexibility, making it a favorite among architects and builders. The method allows for:

  • Customizable Panel Shapes: Panels can be cast in various shapes and sizes to accommodate unique architectural designs.
  • Textured and Decorative Finishes: Using form liners, intricate patterns and textures can be added to the panels. For inspiration on decorative options, you can explore Custom Rock Formliners, a company that has been working with architects since 1971 to provide innovative products and services for the concrete and construction industry.
  • Integration with Other Materials: Tilt-Up panels can be combined with materials like glass, stone, or metal to create visually appealing facades.

Energy-Efficient Qualities and Sustainability Benefits

Tilt-Up buildings are known for their energy efficiency. They offer:

  • Thermal Mass Benefits: Concrete panels absorb and store heat, helping to regulate indoor temperatures.
  • Insulation Options: Panels can be insulated during casting, enhancing thermal performance and reducing energy costs.
  • Sustainability: The use of local materials reduces transportation emissions, while the durability of concrete minimizes maintenance needs over time.

Fire Resistance for Enhanced Safety

Concrete’s fire-resistant nature makes Tilt-Up construction a safer choice. Key benefits include:

  • Non-combustible Material: Concrete does not burn, reducing the risk of fire spread.
  • Heat Resistance: Concrete can withstand high temperatures without losing structural integrity.
  • Improved Safety Standards: Buildings constructed using Tilt-Up methods often meet stringent fire safety codes, enhancing overall building safety.

Choosing Tilt-Up construction provides a blend of design freedom, energy efficiency, and superior safety features. This makes it an attractive option for a variety of building projects.

The Role of the Tilt-Up Concrete Association (TCA) in Promoting Industry Standards

The Tilt-Up Concrete Association (TCA) plays a crucial role in the Tilt-Up construction industry. As a leading organization, it actively promotes and educates people about Tilt-Up construction practices.

Established in 1986, the TCA’s goal is to make Tilt-Up the preferred method for concrete construction by improving its recognition, acceptance, and usage. To achieve this, the association focuses on maintaining high standards throughout the industry.

Here are some key ways in which the TCA contributes to the industry:

1. Development of Industry Guidelines

The TCA creates comprehensive guidelines that establish quality and safety benchmarks for Tilt-Up construction. These guidelines are essential for ensuring consistency and reliability across different projects.

2. Providing Technical Documents

The TCA produces detailed technical documents that cover various aspects of Tilt-Up construction. These resources serve as valuable references for professionals during the planning, design, and execution stages of projects.

3. Offering Educational Initiatives

The TCA conducts a variety of educational programs, workshops, and certifications designed to enhance the skills and knowledge of individuals working in the industry. By investing in education, the association helps maintain high standards within the field.

Through these efforts, the TCA significantly influences the growth and advancement of Tilt-Up construction by promoting best practices and fostering innovation in the industry.

Comparing Tilt-Up Construction with Other Building Methods

Cost-Effectiveness of Tilt-Up vs. Wood-Frame Construction

Tilt-Up construction is more cost-effective than traditional wood-frame construction, especially for commercial and industrial projects. Here’s why:

  • Economies of Scale: Tilt-Up becomes increasingly cost-efficient as the size of the structure grows, making it ideal for larger projects.
  • Material Transportation: On-site casting of Tilt-Up panels reduces the need for transporting materials, resulting in potential cost savings.

Wood-frame construction, on the other hand, is better suited for smaller residential buildings. As the project size increases, it can become less efficient and more expensive.

Strengths and Advantages Compared to Other Methods

Steel Beam Construction

  • Durability: Tilt-Up panels are made of concrete, offering superior durability and longevity compared to steel beams.
  • Fire Resistance: Concrete naturally has fire-resistant properties, enhancing safety without requiring additional fireproofing measures like steel beams do.
  • Cost: The on-site casting of panels can reduce material transportation costs, making Tilt-Up more economical for large-scale projects.

Prefabricated Steel Frame Construction

  • Customization: Tilt-Up construction allows for greater architectural creativity and design flexibility compared to prefabricated steel frames.
  • Installation Speed: While prefabricated steel frames may offer faster initial assembly, the integrated nature of Tilt-Up panels (which include insulation and finishes) can streamline the overall construction timeline.
  • Labor Costs: Prefabrication requires skilled labor for precise assembly, potentially increasing labor costs compared to the more straightforward processes involved in Tilt-Up construction.

Masonry Construction

  • Structural Integrity: The monolithic nature of Tilt-Up panels provides enhanced structural integrity and fewer joints, reducing maintenance needs over time compared to traditional masonry construction.
  • Speed of Construction: Masonry involves laying individual bricks or blocks, which can be time-consuming. In contrast, the large-panel approach of Tilt-Up construction accelerates project completion.
  • Insulation: Tilt-Up panels often incorporate insulation within their structure, providing better thermal performance compared to traditional masonry walls that require additional insulation layers.

In summary, Tilt-Up construction offers a range of benefits across various building methods including:

  • Cost savings through economies of scale and reduced material transportation
  • Enhanced durability and longevity with concrete panels
  • Fire resistance without the need for extra fireproofing measures
  • Design flexibility for architectural creativity
  • Streamlined construction timeline with integrated panels
  • Structural integrity and reduced maintenance needs
  • Improved thermal performance through built-in insulation

Considering Applicability and Limitations in Tilt-Up Projects

Tilt-Up construction is well-suited for various building types, including:

1. Commercial Buildings

Perfect for retail spaces, offices, and shopping centers due to its cost-effectiveness and speed of construction.

2. Industrial Buildings

Ideal for warehouses, manufacturing plants, and distribution centers because of the large, open floor plans it can accommodate.

3. Institutional Buildings

Suitable for schools, hospitals, and government facilities where durability and low maintenance are crucial.

Despite its advantages, Tilt-Up construction comes with specific challenges:

  • Specialized Engineering Requirements: For taller structures, specialized engineering is necessary to ensure stability and safety. This includes advanced structural analysis and design to handle wind loads and seismic forces.
  • Panel Size Limitations: The size and weight of the panels can be restrictive. Larger panels require more substantial cranes and may pose logistical challenges during transportation and lifting.
  • Climate Considerations: In regions with extreme weather conditions, additional measures might be required for insulation and thermal performance.

Tilt-Up construction’s applicability to various building types makes it a versatile option in modern architecture. However, addressing these limitations through careful planning and engineering ensures the successful implementation of this innovative method.

Insulation Considerations for Tilt-Up Panels

Insulating Tilt-Up buildings correctly is essential for maintaining thermal performance and occupant comfort. Without enough insulation, these structures may lose or gain heat significantly, resulting in higher energy usage and discomfort for people inside.

Why Insulation Matters in Tilt-Up Panels

Insulation plays a vital role in Tilt-Up panels for two main reasons:

  • Thermal Performance: Insulated Tilt-Up panels act as a barrier against outside temperature changes. This helps keep indoor temperatures stable, reducing the reliance on heating or cooling systems.
  • Occupant Comfort: Well-insulated buildings create a pleasant atmosphere, which is crucial in places like offices or schools where many individuals gather.

Insulation Options for Tilt-Up Panels

Tilt-Up construction offers several insulation choices, each with distinct benefits:

Rigid Foam Insulation:

  • Widely used because of its high R-value (thermal resistance).
  • Simple to install between the concrete layers during panel casting.

Spray Foam Insulation:

  • Provides excellent coverage and can fill gaps more effectively than rigid foam.
  • Although it has a higher initial cost, it offers superior thermal performance.

Mineral Wool Insulation:

  • Offers fire resistance along with thermal insulation properties.
  • Heavier and more challenging to install compared to foam options.

Comparing Tilt-Up Panels with Other Wall Systems

When comparing Tilt-Up panels with alternative wall systems like wood framing or masonry:

Wood Framing

Wood framing can be insulated using batts, blown-in insulation, or spray foam. However, it typically has lower thermal mass compared to concrete panels used in Tilt-Up construction.

Masonry Walls

Masonry walls often require external insulation systems (EIFS) or internal insulation solutions. While they have higher thermal mass than Tilt-Up panels, their effectiveness may be limited without additional insulation layers.

Tilt-Up construction with proper insulation can offer superior long-term energy efficiency and occupant comfort, making it a viable choice for many types of buildings.

Conclusion

Exploring the possibilities of Tilt-Up construction can open new doors for your building projects. This innovative method offers:

  • Cost-effectiveness: Ideal for larger projects, saving both time and money.
  • Design flexibility: Allows for creative architectural designs.
  • Energy efficiency: Provides superior insulation and sustainability benefits.
  • Safety: Concrete’s fire-resistant properties enhance building safety.

By considering Tilt-Up construction, you’re investing in a modern, efficient, and versatile building method.

FAQs (Frequently Asked Questions)

What is Tilt-Up construction?

Tilt-Up construction is a building method that involves casting concrete wall panels on the ground and then lifting them into position with cranes to form the exterior walls of a structure.

What are the key benefits of choosing Tilt-Up construction for building projects?

Tilt-Up construction offers design versatility, energy efficiency, and fire resistance, making it a popular choice in the construction industry. It also provides opportunities for architectural creativity and long-term sustainability benefits.

What are the main steps involved in the Tilt-Up construction process?

The main steps in Tilt-Up construction include preliminary project planning, site preparation and foundation slab pouring, assembly of forms for the wall panels, installation of reinforcing bars within the panels, pouring concrete with insulation in place, lifting and placement of panels using cranes, removal of forms after curing, and finishing touches on the exterior walls and joints.

How does Tilt-Up construction compare to other building methods such as wood-frame, steel beam, prefabricated steel frame, and masonry construction?

Tilt-Up construction is cost-effective compared to traditional wood framing and offers strengths and advantages over other methods like steel beams, prefabrication, and masonry. It provides design flexibility, energy efficiency, and fire resistance that are not always present in other building methods.

What types of structures is Tilt-Up construction suitable for?

Tilt-Up construction is suitable for various types of structures including commercial, industrial, and institutional buildings. However, it may have potential challenges and limitations that need to be addressed for taller structures or specialized engineering requirements.

Why is proper insulation important in Tilt-Up buildings?

Proper insulation in Tilt-Up buildings is important for thermal performance and occupant comfort. It helps regulate indoor temperatures and can contribute to energy efficiency.

Precast Concrete Walls: A Testament to Modern Construction

Understanding Precast Concrete

Precast concrete is a construction material produced by casting concrete in a reusable mold or form, cured in a controlled environment, then transported to the construction site for installation. These precast elements come in various shapes and sizes, with precast concrete walls being one of the most common applications.

What Makes Precast Concrete Panels Stand Out?

●       Versatility: Precast concrete panels offer a wide range of design options and applications, making them adaptable to various construction projects.
Whether it’s for architectural detailing, structural support, or aesthetic enhancement, precast panels can be customized to meet specific project requirements.

●       Quality Control: One of the key advantages of precast concrete panels is the rigorous quality control measures implemented during manufacturing.
By producing panels in a controlled environment, manufacturers can ensure consistent quality and durability, minimizing the risk of defects or inconsistencies.

●       Time Efficiency: Prefabricated precast panels streamline the construction process by allowing for rapid installation on-site.
Since the panels are manufactured off-site and delivered ready for installation, construction timelines are significantly reduced. This not only saves time but also lowers labor costs associated with on-site assembly and construction.

Advantages of Precast Concrete Walls

Precast concrete walls offer numerous advantages over traditional construction methods, making them an increasingly popular choice in modern building projects.

Advantages Details
Strength and Durability Precast concrete walls are renowned for their strength and durability, providing long-lasting structural integrity.
Fire Resistance The inherent properties of concrete make precast walls highly resistant to fire, enhancing building safety.
Sound Insulation Precast concrete panels offer excellent sound insulation properties, reducing noise pollution and enhancing comfort.
Weather Resistance With proper sealing and treatment, precast concrete walls withstand harsh weather conditions, ensuring longevity.


Applications of Precast Concrete Walls

Precast concrete walls are highly versatile and find applications across various sectors due to their durability, efficiency, and aesthetic appeal.

●       Residential Buildings:

●       Single-family Homes: Precast concrete walls offer homeowners a cost-effective and durable solution for their residential construction needs. These walls provide excellent structural integrity and can be customized to suit different architectural styles.

●       High-rise Apartments: In urban environments, precast concrete walls are commonly used in high-rise apartment buildings. Their rapid installation and fire resistance make them an ideal choice for multi-story structures.

●       Commercial Structures:

●       Offices: Precast concrete panels are popular in office construction due to their quick installation and customizable designs. They provide a modern and professional appearance while ensuring structural stability.

●       Shopping Malls: Shopping malls benefit from the versatility of precast concrete walls, which can be tailored to fit various retail environments. Their durability and low maintenance requirements make them an attractive option for developers.

●       Hotels: Precast concrete walls are often used in hotel construction for their ability to meet strict building codes and regulations. They offer noise reduction properties and enhance the overall guest experience.

●       Industrial Facilities:

●       Warehouses: Precast concrete walls provide the durability and strength required for industrial facilities such as warehouses. Their resistance to wear and tear ensures long-term structural integrity, even in high-traffic areas.

●       Manufacturing Plants: Industrial facilities, including manufacturing plants, rely on precast concrete walls for their ability to withstand heavy loads and harsh environmental conditions. These walls offer a stable and secure environment for production processes.

●       Infrastructure Projects:

●       Bridges: Precast concrete components, including walls, are used in bridge construction for their durability and ease of installation. Prefabricated elements help streamline construction schedules and minimize disruptions to traffic.

●       Retaining Walls: Precast concrete retaining walls are commonly used in infrastructure projects to prevent soil erosion and provide structural support. Their modular design allows for efficient installation, reducing construction time and costs.

●       Sound Barriers: Along highways and railways, precast concrete walls serve as effective sound barriers, reducing noise pollution for nearby communities. These walls are designed to absorb and deflect sound waves, improving overall environmental quality.

Precast concrete walls offer a versatile solution for a wide range of construction projects, providing durability, efficiency, and aesthetic appeal across residential, commercial, industrial, and infrastructure sectors.

CustomRock: Pioneering Precast Concrete Construction Types

CustomRock is at the forefront of innovative precast concrete solutions, offering a diverse range of construction types tailored to meet the needs of modern builders.

Our Services

  • Precast Wall Systems: Explore our precast wall systems, designed for durability, efficiency, and aesthetic appeal.
  • Architectural Panels: Discover our architectural panels, offering customizable designs to enhance the visual appeal of any structure.
  • Sound Walls: Our sound walls provide effective noise reduction solutions for highways, railways, and urban environments.

Conclusion

Precast concrete walls, including precast concrete panels, offer a sustainable, cost-effective, and efficient solution for modern construction projects. With CustomRock’s expertise in precast concrete construction types, builders can achieve superior results in their endeavors.

By embracing the versatility and benefits of precast concrete, construction projects can be executed with enhanced efficiency, durability, and aesthetic appeal.

FAQs:

  • What are the advantages of precast concrete walls over traditional construction methods?
    • Precast concrete walls offer superior strength, durability, and efficiency compared to traditional construction methods.
  • Can precast concrete panels be customized to suit specific design requirements?
    • Yes, precast concrete panels can be customized in terms of design, texture, and finish to meet the aesthetic preferences of the project.
  • Are precast concrete walls suitable for sound insulation purposes?
    • Yes, precast concrete walls provide excellent sound insulation properties, making them ideal for noise reduction in various environments.


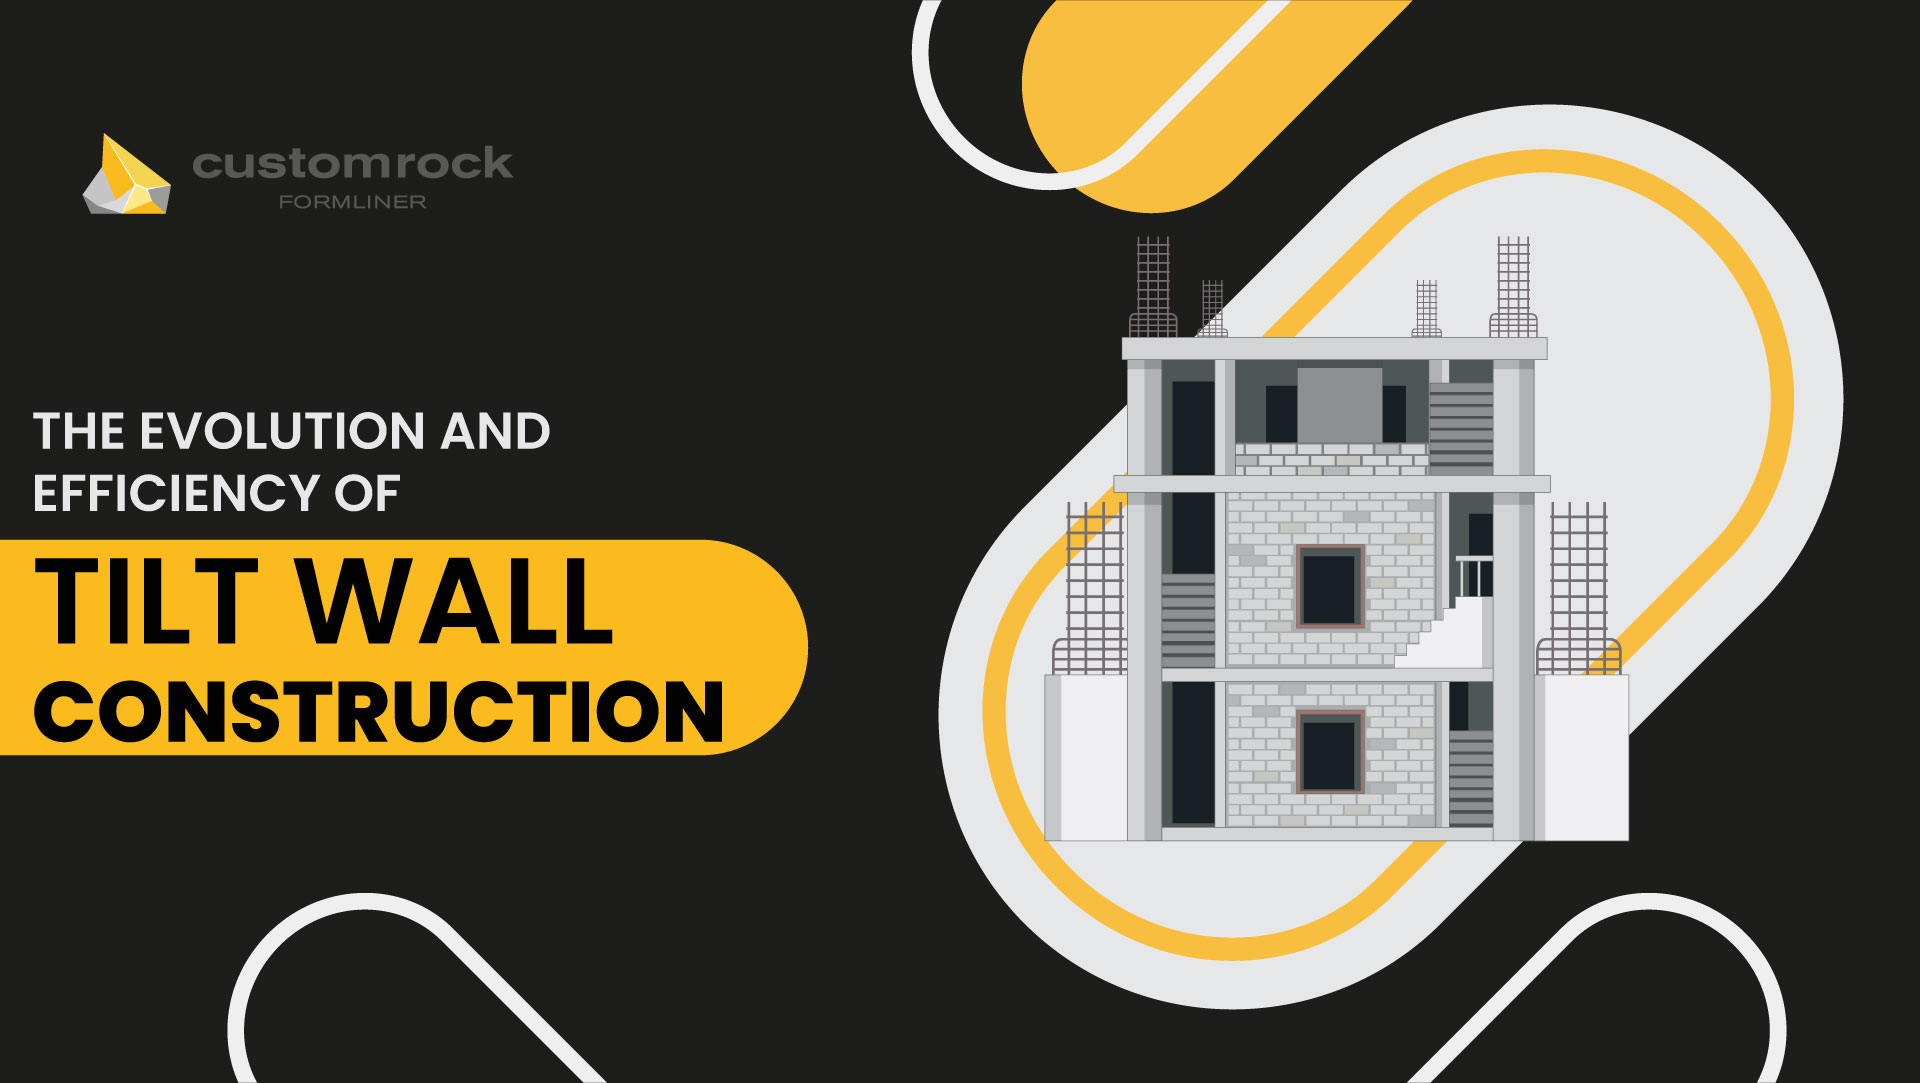
The Evolution and Efficiency of Tilt Wall Construction

Tilt wall construction, also known as tilt-up or concrete tilt wall construction, stands as a revolutionary method in the realm of modern building techniques.

This innovative approach not only streamlines the construction process but also introduces a new level of efficiency and sustainability in the creation of commercial, industrial, and even residential buildings.

What is Tilt Wall Construction?

Tilt wall construction is a method where large concrete panels are cast on-site and then raised into position to form the walls of a building. This technique combines the strength of concrete with the efficiency of panelized construction, making it an increasingly popular choice for a wide range of construction projects.

Key Benefits of Tilt Wall Construction

Tilt wall construction, a method where concrete panels are precast on the construction site and then tilted into place to form the walls of a building, offers significant advantages over traditional construction techniques.

These benefits not only enhance the efficiency and cost-effectiveness of building projects but also ensure long-term durability and resilience of the structures.

Speed of Construction

Tilt wall buildings can be erected significantly faster than those built with traditional construction methods. This rapid pace is due to the streamlined process of casting concrete panels directly on-site, which eliminates the need for extensive scaffolding and masonry work.

As a result, projects can move from the foundation stage to a fully enclosed structure in a fraction of the time, reducing overall construction timelines and allowing faster occupancy.

Cost-Effectiveness

One of the most compelling advantages of tilt wall construction is its cost-effectiveness. By reducing the need for labor-intensive construction techniques and minimizing the materials transported to the site, tilt wall construction can significantly lower both labor and material costs.

Furthermore, the ability to use local materials reduces transportation expenses, contributing to the economic efficiency of the construction process.

Durability

Concrete, the primary material used in tilt wall construction, provides exceptional resistance to weather, fire, and pests. The inherent strength and resilience of concrete ensure that tilt wall buildings can withstand severe weather conditions,

including hurricanes and tornadoes, better than many traditional structures.

Additionally, concrete’s fire-resistant properties add an extra layer of safety, while its resistance to rot and pests reduces maintenance costs over the building’s lifespan.

Comparative Efficiency and Benefits

To visually compare the efficiency and benefits of tilt wall construction against traditional construction methods, consider the following table:

Benefit Tilt Wall Construction Traditional Construction
Speed of Construction Significantly faster Slower, more labor-intensive
Cost-Effectiveness Reduced labor and material costs Higher labor and material costs
Durability High (resistant to weather, fire, pests) Variable, depending on materials used

This table underscores the advantages of tilt wall construction, highlighting its superiority in terms of speed, cost, and durability compared to traditional construction methods.

The Process of Tilt Wall Construction

Tilt wall construction, a streamlined and efficient building technique, follows a sequence of critical steps, each playing a vital role in the creation of durable, cost-effective structures. Here’s a closer look at the stages involved:

Preparation of the Slab

  • Site Preparation: Initially, the construction site is cleared, leveled, and compacted to ensure a stable base for the slab and subsequent construction activities.
  • Foundation Laying: A concrete slab foundation is then laid out. This slab does more than just support the structure; it serves as the casting surface for the tilt-up panels. The precision in this step is crucial for the alignment and integrity of the final construction.

Panel Forming and Casting

  • Form Construction: On the prepared slab, wooden forms are constructed according to the specific dimensions and designs required for the building’s walls. These forms act as molds into which concrete is poured.
  • Reinforcement Placement: Reinforcing bars (rebar) are strategically placed within these forms to enhance the strength and durability of the concrete panels.
  • Concrete Pouring and Curing: Concrete is poured into the forms, filling them to create the panels. Once poured, the concrete must cure—a process that solidifies and strengthens the material—before the panels can be moved.

Panel Lifting and Placement

  • Lifting the Panels: After curing, the concrete panels are ready to be lifted. Cranes are employed to carefully raise each panel from the slab.
  • Tilting into Position: The panels are then tilted up to a vertical position and moved into place around the building’s foundation. This is a highly skilled operation that requires precision and expertise.
  • Securing the Panels: Once in position, the panels are anchored to the foundation and to each other, forming the exterior walls of the building. This step ensures the structure’s stability and durability.


Efficiency Through Innovation

Tilt wall construction’s efficiency lies in its simplicity and the use of concrete—a material known for its strength and versatility.

The ability to create large, custom panels on-site reduces transportation and material costs, while the speed of erecting these panels significantly cuts down construction time.

Evolution of Tilt Wall Construction

The origins of tilt wall construction can be traced back to the early 20th century, with its popularity surging in the post-war era as a cost-effective solution for rapidly constructing industrial buildings.

Over the decades, advancements in technology and materials have expanded its use to more complex and aesthetically pleasing designs.

Modern Advances in Tilt Wall Construction

The evolution of tilt wall construction is marked by significant technological and material advancements. These improvements have expanded the method’s capabilities, allowing for more complex designs and efficient construction processes. Here are the key areas of progress:

Improved Concrete Mixes

  • Enhanced Strength: Modern concrete mixes are engineered to achieve higher compressive strengths, allowing tilt wall panels to support greater loads. This makes tilt wall construction suitable for a wider range of buildings, from industrial warehouses to high-rise office buildings.
  • Increased Workability: Advances in admixtures and mixing technology have resulted in concrete that is easier to work with, enabling more precise and smoother pours. This improves the quality of the finished panels, with fewer defects and a better surface finish.
  • Faster Curing Times: Innovations in concrete formulations include additives that speed up the curing process, reducing the time from pouring to panel erection. This accelerates the overall construction timeline, delivering projects faster to clients.

Sophisticated Lifting Equipment

  • Greater Precision: The development of more sophisticated cranes and rigging equipment allows for the precise placement of tilt wall panels. This precision is crucial for ensuring the structural integrity of the building and for aligning panels with complex architectural features.
  • Enhanced Safety: Modern lifting equipment includes advanced safety features and monitoring systems that reduce the risk of accidents during the lifting and tilting process. These improvements protect workers on site and ensure compliance with stringent safety regulations.
  • Increased Capacity: The availability of cranes with higher lifting capacities has expanded the potential size and weight of tilt wall panels. This allows for larger, more ambitious projects to be undertaken using tilt wall construction methods.

Architectural Flexibility

  • Innovative Formwork Technology: Advances in formwork technology enable the creation of tilt wall panels with intricate shapes and designs. This has opened up new possibilities for architectural expression, allowing buildings to feature curved walls, detailed embossing, and complex geometric patterns.
  • Versatile Finishes: The development of new surface treatments and finishing techniques for concrete allows tilt wall buildings to achieve a wide variety of aesthetic looks. From polished concrete to simulated stone textures, these finishes can enhance the visual appeal of the structure.
  • Integration with Other Materials: Modern tilt wall construction can seamlessly incorporate other building materials, such as glass, metal, and wood, into the design. This integration allows for more diverse and visually striking buildings, catering to the demands of contemporary architecture.


Concrete Tilt-Up Wall Construction: A Closer Look

Concrete tilt-up construction is not just about efficiency; it’s also about sustainability and resilience. The use of insulated concrete panels provides excellent thermal mass, reducing energy consumption for heating and cooling. Moreover, the durability of concrete means buildings are built to last, with minimal maintenance required over their lifespan.

Comparative Efficiency:

Construction Method Speed Cost Durability
Tilt Wall Construction Fast Economical High
Traditional Brick Moderate Higher Moderate
Steel Frame Quick Variable High

Future Directions in Tilt Wall Construction

As we look to the future, tilt wall construction is poised for further innovation. The integration of technology, such as 3D printing and automated lifting mechanisms, promises to enhance precision and reduce manual labor, pushing the boundaries of what can be achieved with this construction method.

Conclusion

Tilt wall construction embodies the evolution of building techniques, marrying the ancient strength of concrete with modern engineering ingenuity. Its efficiency, cost-effectiveness, and sustainability make it a compelling choice for a wide range of construction projects.

For more insights into construction techniques and to explore various construction types, visit Custom Rock Construction Types.

Sculpting Spaces with Architectural Precision

Formliners are an important tool in the architectural world used to shape and sculpt concrete with precision. Typically, formliners are made of materials such as rubber, plastic, or fiberglass and are designed to fit perfectly inside formwork.


The main purpose of formliners is to create textures and patterns on concrete surfaces. This gives the structure a unique and visually appealing appearance. Ensuring architectural precision is easy for architects if they choose to work with formliners instead of traditional techniques.


5 Ways Formliners Provide Architectural Precision

Formliners provide architectural precision in numerous ways. They contribute to the accurate execution of designs and patterns which helps in enhancing the overall aesthetics of concrete structures.

Here are the 5 ways formliners achieve architectural precision:

1.    Consistent Patterns and Textures

When formliners are manufactured, they are crafted with attention to detail. Manufacturers ensure that the patterns and textures are uniform and consistent throughout.

It allows architects to make sure that they achieve the desired aesthetics with accuracy. The final result is a cohesive and polished appearance that makes the structure unique.

Consistent patterns and textures make it possible for architects to create harmonious and well-designed architectural structures.


2.    Accurate Reproduction of Details

Formliners are capable of reproducing accurate details and textures on concrete surfaces. Some of these details include:

  • Logos
  • Branding elements
  • intricate reliefs
  • Customized designs and textures

Some architects often incorporate these features into their projects to create a distinct identity or theme. Formliners play an important role in bringing these features to life. With the help of custom-made formliners and pre-designed patterns, architects can transfer details during the pouring process.

This level of accuracy and precision helps architects to create unique and visually stunning concrete surfaces for their clients.


3.    Repeatability

Repeatability refers to the ability to consistently replicate patterns and designs across the structure. Whenever architects work on a large-scale project, they need to ensure that all sections of the structure have a consistent design.

Formliners help them in achieving repeatability as it provides a reliable and consistent means of creating decorative surfaces. Since the formliners are manufactured with high precision and accuracy, they leave little margin for error.

Formliners ensure that all sections of the building have identical patterns and textures. It eliminates the chances of error that traditional techniques pose. Repeatability assists architects in completing successful projects with minimum time and effort.


4.    Controlled Depth and Relief

Formliners allow architects to achieve controlled depth and relief in architectural structures. They offer designers great control over the depth of formliners that allows them to tailor visual effects according to the project requirements.

Moreover, by having control over the relief, architects can achieve different effects such as subtle textures and pronounced designs.

For example, an architect may want to create a repetitive geometric pattern on a building’s exterior. With the assistance of formliners with controlled depth, they can decide the extent to which a pattern sticks out from the surface. This will allow the architect to create cohesive and engaging facade.


5.    Integration with Sustainable Solutions

Some formliners are made of eco-friendly and recyclable materials that contribute to sustainable building practices. Utilizing formliners aligns with the values of the architectural industry that promotes eco-friendly design choices.


How do Formliners Work?

Formliners are special molds that are designed to be placed inside a formwork. A formwork acts as a temporary mold that contains liquid concrete until it hardens. Below are step-by-step points that explain how formliners work

●      Setting up Formwork

In the first step, formwork is used to identify the shape and size of concrete elements that an architect wants to create. Formwork can be made of any material which includes metal, wood, plastic, or fiberglass.

●      Placement of Formliner

Then a formliner is placed inside the formwork; adhering to its inner surfaces. These formliners are typically made of materials such as rubber, plastic, or fiberglass. They also come in different patterns and textures which allows diverse design possibilities.

●      Pouring Concrete

After the formliners are in place, concrete is poured into the formwork. It covers the formliner entirely and fills its recesses.

●      Curing Concrete

After the pouring process, the concrete is left to cure and harden. During this process, formliners transfer their patterns, textures, and shapes onto the concrete surface. Curing helps in creating the desired visual effect as it binds formliners and concrete.

●      Formwork Removal

After the completion of curing, the formwork is removed. The final product is the concrete surface with patterns and designs imprinted by the formliner.

  • Revealing the Pattern

Once the formliners are removed, the concrete surface will show the pattern and design imprinted by the formliner. The final surface will show the intended design and all the texture elements.

It is vital to ensure that formliners’ compatibility with the concrete mix. With the help of the right choice and proper installation, architects can ensure durability and longevity of the construction projects.